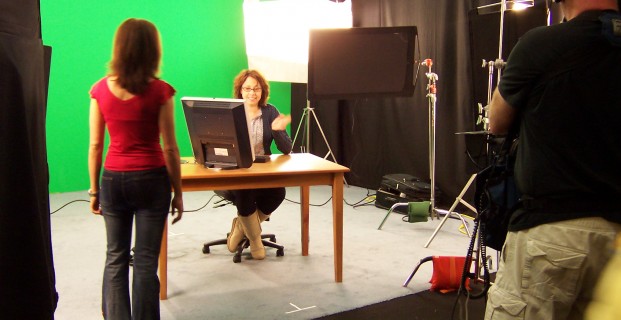
LIGHT is perhaps the single most important ingredient in creating good photographs or video in a studio environment. With still photography the photographer deals with the lighting for only one camera angle. With video the same is true if only one camera is used. Add one or two additional cameras and lighting for each camera angle, and still maintaining continuity, becomes much more complex.
But for now I will discuss the lighting for just one camera and one subject as used in a studio shoot. The procedure to solve any lighting problem has two parts. First an understanding of the PINCIPLES of LIGHT, and then the patient MANIPULATION of the various lighting sources or fixtures.
With any lighting set up, the PRINCIPLE is to create a natural, attractive subject lighting which simulates a natural “outdoor” lighting effect. “Outdoor” lighting is the standard of comparison for most lighting set ups. With the sun shining, the subject would have only one dominant shadow. So now for the hard part, the MANIPULATION of the studio lights so as to create only ONE dominant shadow.
First there are two basic types of artificial lighting: Hard Lights and Soft Lights. A Hard light will cast a shadow with a clearly defined edge, such as if the subject were in a spotlight. A Soft light creates a much more diffused light, and the subject’s shadow will be fainter and have a less defined edge.
THREE POINT LIGHTING
The most basic lighting set up is known as Three Point Lighting. This system uses three different types of lights, in three different positions around the subject. They are: The Key, The Fill, and The Back light.
The Key Light provides the main source of illumination and modeling. It is usually set at a 30-45 degree angle from camera center, and to one side or the other of the camera position. A Key Light fixture can vary depending on the distance from the camera to the subject and creates the one dominant shadow. Some examples are: 650w Tweenie II; 750w or 1000wFresnel; or a 1000w Baby.
The Fill Light provides detail within the shadow side of the subject and softens the impact of the Key Light. A fill light shadow can be on the background, but only if it a faint one. Try to keep the Key to Fill light ratio 3-4:1. A couple of good Fill Light fixtures would be: A 200-300w Fresnel; a 1000w Junior ridged with a Chimera Junior Plus-Small; or a 650w Fresnel with a Scrim attached.
The Back Light or Hair Light is placed high above the subject and is used to outline the subject and to help separate the subject from the background. A good Hair Light fixture would be: a 650w or 1000w Tweenie II with barn doors. If the Hair Light casts a glare in the camera lens, then a Flag mounted on a C-Stand can be placed near the camera lens to block it.
The final lighting element would be the Background Light, if there is a shadow on the background that needs to be softened or eliminated altogether. First of all the subject should be at least 10-12ft away from it. This should stop the Key Light shadow. If not you can raise up the Key Light a little higher. To help light the background two fixture types are very helpful: A 1000w Mole Space Light or a 4ft Kino Flo light bank. Both would be mounted up high, such as from a lighting grid.
COLOR TEMPERATURE
All of the lights discussed in this studio set up are 3200Kelvin ( Tungsten ). If you need to shoot with a Daylight or 5200K set up, then you would have to either change all of the bulbs, in all of the fixtures or add a correction gel sheet in front of each light with C-47s (wooden clothes pins).
Now thanks to the addition of using LED light bulbs in the studio fixtures, the color temperature can be easily changed with a dial – from 3200 and back to 5200. Very easy and now all of the major manufacturers make light panels using this technology: Arri; Kino Flo and Mole. LED lights run a lot cooler than their hot bulb tungsten or HMI counterparts, but they also cost 3x more. LEDs are still a relatively new technology so after a while the unit prices should start to come down.
So now that we have gone over the PRINCIPLES of lighting, light fixtures, color temperature and the Basic Three Point set up, the next step is the patient MANIPULATION of all of these various lighting fixtures. Remember first place the Key light, and see what it does to the subject, before you start adding the other lights. If there is only one dominant shadow, then you can start adding the Fill lights and white foam core bounce cards to add a little detail in the shadow side of the subject and to eliminate any secondary shadows on the background.
Lastly add the Hair light and a Background light if you need to eliminate any faint secondary shadows. Take a look at the final set up and remember only one dominant shadow. If it looks good, start shooting.

